Thursday, 19 November 2009

Finding the Perfect Image - Google Images & Google Swirl


When you're involved in your blog and web design, you'll find yourself wanting to use images to attract the attention of others. As they say – a picture is worth a thousand words.

The web is flooded with images to choose from. A note of caution though – many images are copyright. That means you may not use every image you see. However, even if you aren’t going to use the images, you may wish to simply learn about something from seeing it without having to save it and re-use it.

Let's take an example of an image we might wish to see. In the old days, if the average person wanted to learn more about the workings of the body – to see the various parts and how they work, one would have to obtain expensive medical books or encyclopedias in order to see appropriate photographs and diagrams – a costly business – especially if one simply wanted quick access to just one or two images!

Today, one can simply type a word into a search box and immediately find what one needs. Here's another example: In the old days, unless one was a deep-sea diver, one could never hope to see the plethora of fish in the oceans except through purchasing expensive magazines. Today, at the click of a button, one can see just about anything one can imagine exists!

Google provides a number of easy ways to access images. The most basic way to find images is to use the ordinary image search tool. Here's what you need to do:

1. Type in http://images.google.com/
2. In the search box do a search for something that interests you. Example: Heart
3. DONE!

You'll be presented with thousands of images on your choice of topic. Click on any of them to see the image within the web page that it appears. You'll get to learn more about the different parts of the heart and how it all works. From here, you might even get taken to a page that teaches CPR. With a basic understanding of the heart and it's influence on the body (quite important!) – you'll be well prepared to help someone who might stop breathing… All from having learned a little about the anatomy of the heart from a simple Google image search!

This method is a great way to view what you need to, and if the images are not copyright – to be able to use them in your web site or blog to attract additional attention. Don't forget, people who find your images by doing a search using the Google image search will click on them and be taken to your site – increasing traffic – which is the key to successfully getting yourself known on the Internet and beyond.

Google's latest development brings a whole new understanding to image searching. It's called Google Swirl. It's all about searching for a particular image and then finding an assortment of images even more deeply related to the topic you're searching for. If we use the heart as an example, you'll find that Google Swirl will take the same image you're looking for, and find various versions of it. You'll find one with the different parts of the heart labeled. Another will be a photograph and yet another a simple sketch. The Swirl will allow you to view at a glance the type of image you're after with variations on it – so that you can find the most suitable image of exactly what you're looking for. It continues to Swirl around and around until ultimately you find the perfect image.

You can try Google Swirl (still experimental) with the exact same search as you would have done in the image search above, and compare the results you get. You'll begin to get a feeling of which search tool provides you with the better images that you're after.

Here's how to use Google Swirl:

1. Type in http://image-swirl.googlelabs.com/
2. Do a search for something that interests you e.g. Heart
3. DONE!

Compare the selection of images you get via the ordinary image search to the way that the Swirl works, to find which suits you better.

They're both ultimately terrific tools to help you find the image you're after, and ultimately navigate your way to an article somewhere on the web that will help you learn more about what you're after. Once you know that, take the knowledge you have, and share it in an informative way for others to learn from. Drive them to your site, make new friends, new contacts, new networks, and ultimately make the best use of the web to generate further wealth. Good Luck!

Monday, 16 November 2009

Article Directories - Your Personal Magazines on the Internet


Article Directories
Your Personal Magazines on the Internet

This blog is all about getting yourself known out there. If you're wanting to make use of the Internet to generate wealth (which it really can do,) you need to get the entire world to know about you. It's no good just having family and a few friends know about you, because they already know what you can do.

Imagine the biggest marketers in the world today selling their wares to family and friends only… They may not make many sales. In fact they may not make any sales at all! You've probably heard the expression "You can't be a prophet in your own city." In other words, if you walk around your own city dressed up in the most mystical of garments rolling your eyes – even if you *are* a prophet, nobody will believe you. The reason is simple… Since everyone already knows you – and they know you're just an ordinary person, you certainly can't be a prophet! But when you do the same things in another city – you're sure to get a lot of attention with everybody recommending your terrific services.

When it comes to marketing, let the Internet be the place to let yourself get out to the entire world! You can use web pages and blogs. But there's another great place to get yourself known on – Ezines. E-Zine is the shortened form for Electronic magaZINE. In the "old days" one would buy a paper magazine (do they still have them?) – where one could find the articles that appealed to one. Today one can literally find complete magazines online without having to buy the real paper version.

Because ezines became so popular, the Internet expanded itself out to allowing for people to post articles of wisdom and the like in a form that catches people's attention as being authoritative in a particular area. E-zine expanded from the idea of complete magazines to being set up as article directories. Not full magazines, but rather places where hundreds of thousands of authoritative articles exist on just about every subject possible! What area are you an expert in? Animals? Medicine? Law? Accounting? Computers? The subjects are infinite…

Now, imagine for a moment having one Internet site devoted exclusively to the best of articles written by the most authoritative people today (you know, like you and me?) People would flock there every single day to see the latest posts that could help them understand the world better – from an authoritative point of view of course! This article that you are reading – for example – may be considered just that, as I go about sharing with you the benefits of writing educational articles for the world to read.

So here you go… You have the ability to write and you want the world to see your work. You can write on your blog and get "only so much" traffic. Many people will see your article. You can write on your own web site and also generate traffic and begin to make new connections with others – when they realize how smart you are. But imagine a site that is regularly getting hundreds of thousands of hits a day… and people are constantly searching for the topic you're the authority on? They're going to be reading your article!

Then, they'll be so excited about your wisdom that they'll want to learn more about you. They'll click on a link showing them a brief biography of the person whose article they're reading (i.e. you), and then perhaps even see their web site and blogs advertised. THEN they'll click on those sites, and see the real you – that much more closely.

It's another great way to let others know how talented you are – how much you have to share with others, what you are able to share and give to others… and of course be the opening gate for you to introduce what services or products you have to sell. This may even be your own writing.

Someone is bound to see your creativity and greatness and want to employ your services, purchase your products, or hire you to be the next CEO of the next biggest marketing company in the world.

The idea sounds great – you say. Now, how do I actually go about submitting my articles?

I'm going to recommend one terrific site to you. I believe (personally) that it is the biggest available article site on the Internet. You'll get tremendous exposure and you'll see people will find their way to your sites in no time at all, generating extra traffic (which really means extra income in the end) for you. If you don't believe me, why not take a look at my own details on it to see just how many articles I have already written, and how much exposure I've had from it.

Those wishing to learn about other sites, are welcome to be in touch with me directly, and I will be happy to make further recommendations. There are some that even often a few extra pennies for your hard work. That's right! It's a great deal. You write what you enjoy writing, and they pay you. Payment is done on a per view basis. If your article is genuinely good, then millions of people will be reading it – right?! Well then the deal is fair! If it's such a great article, and millions are reading it, you need to be compensated accordingly. And so you are. Don't expect to make millions from these sites, but rest assured, if you do contribute, you will receive payment. I myself use a number of sites and feel I have gained tremendously from all of them.

As a bonus, if you choose to join some of the paying sites, and you're able to convince others of their value, you'll be paid a small bonus amount from the site for having recommended them as well. This means that when those friends of yours write articles and others read them, both your friends and you will receive a little something extra.

Let's go now and join, write some articles, and may this lead to generating even further wealth!

1. Go to www.ezinearticles.com
2. Notice the top left block – where you'll see everything you need to get going
3. You'll also notice on the top of the screen that there are over 200 000 experts!
4. Click on "Submit Articles" – top left corner – or top right corner "Join Now"
5. Fill our your personal details
6. DONE!

You're now registered. If you go back to the site again, and click on Members Login, you'll be able to edit a number of important details (which we are not going into at the moment) and be able to submit your article (which we can discuss another time.) Keep in touch and let me know how you're progressing.

Thursday, 12 November 2009

Back up... Backup...


BACK UP… BACKUP…

If you're going to be using your computer and the Internet to generate wealth, you'll find every possible tool for doing so available to you – both online and off. There is one thing you'll need to be very careful about though – your data… your information. Once you get started, whether with blogging, web sites, or any type of computer work, you'll find yourself so carried away with working, that you may forget the actual value of your data. Of course, you'll appreciate the value of your data, but somewhere along the line, you'll take it all for granted.

One of the keys that will aid you in keeping check of your data, information and even your wealth – is keeping your details secure. Today, having your information on your computer alone is simply not enough. You see, with just one virus, a Trojan horse, your hard drive crashing, or a problem with your operating system, you may turn your computer on one day to find it… empty! Imagine the thousands of pictures you've edited, the thousands of documents you're written, the thousands of everything else! And now… it's gone!

There's no turning back once this happens. Time has gone on, and nobody will be interested in your precious information. The salesman who sold you your "flawless" computer (as he told you when he sold it to you) will most likely not even acknowledge you this time around – when you go to him to complain about the real quality of the machine purchased.

As for the CEO of the software company that sold you your operating system – and the rest of the crowd… you may find them interested in your problem if you're willing to spend a little extra, but even then, they won't be guaranteeing any returns on your new "investment."

As for the CEO of the company involved in selling you your 10 000 Terabyte super fast, super stable, super perfect hard disk drive: When it comes to your complaining about the fact that it's just not working any longer – don’t expect his sympathy. You'll be lucky if he's interested in replacing your drive with a brand new one at no charge just to keep you going as a consistent client.

What about your computer technician – the one who is forever fixing your machine when things go wrong? Well, if you haven't called on him in some time – don't blame him that everything has gone. He may well have already warned you about purchasing an external backup device – ready to sell it to you – but you simply felt it a waste of money!

So it's time to face facts and get on with looking after your own work, because anything and everything can go wrong. If it does, and you're not prepared for it, it doesn't matter how expensive your computer was when you purchased it, it doesn't matter how much information you had on it… it will all be gone!

I'm going to suggest just two great backup plans for today. I consider them both golden… so though it may seem like an extra expense – and even a "waste of time" – there may come a time you'll really appreciate these points:

1. Get yourself an external hard drive. You can go to your local computer store and find a range of drives available. You'll find drives of 500GB in size (pretty acceptable by today's standards!) You'll find bigger too, and perhaps some a little smaller. I'd recommend this as a bare minimum by today's standards. Pictures take up huge amounts of space, and the drive gets filled up so quickly, you'll regret buying smaller when you find the constant need to buying more drives later on. Actually if you can, I'd suggest buying at least 1 Terabyte – 1000GB to start with! You'll get them in different physical sizes. They come in even pocket sizes that can literally fit into your pocket. This is great if you ever want to carry it around with you for any reason – or if you want to just keep the drive at someone else's home in case anything happens in your own… It's really easy to store.

HOW TO BACKUP:

Backing up your data onto this drive is really easy. All you need to do is plug the USB cable into your computer, and once it connects, transfer the files you'd like to backup, much like you would copy and paste files within your one computer drive. Select the files you want to back up. Click Ctrl-C to copy the files you want to copy. Click Ctrl-V to paste the files into your new super-duper external backup drive.

2. Your second choice of backup concerns using the Internet to do so. Today, it's become even easier than ever to do. What this means is that once your data is sitting on someone else's machine (i.e. on the Internet), should anything happen to your physical computer (it could be stolen) – or should the data corrupt, you will easily be able to simply download your backed up files onto a new machine. Your data is safe! I must admit that I very much enjoy the idea of knowing my data is safe "somewhere else" (wherever that is!) I know that if data is lost and I've got a backup somewhere else on the Internet, that I don't have to worry about heavy external drives, plugging them in – and then praying that the data will still be safe there. I'm happy to know that my data is available somewhere else safe! I'm also happy to know that should I have to change locations and need my data that isn't currently with me, I can easily download it from the Internet storage location. Today you can backup your entire drive at a minimal cost (even for free!) You can also separate different information to different locations eg. Pictures to one location, documents to another etc.

HOW TO BACKUP ONLINE

Here are a few steps to backing up your data online.

1. GOOD NEWS! As of November 11, Google are now offering all users the possibility of backing up to 16 Terabytes of information for just $4096 a year! Of course you don't need it all. So let me break that down for you… They're charging just $5 a year for 20GB of space. That is an incredible amount of data for a relatively low cost. Where can you use the Google backup? You can use it for pictures – for example. By signing up with Google Picasa, you will get your very own Album space to upload all your photographs. You can choose to keep some albums private so that only you have access to them, or make them all visible. You can upload all your photos here, and keep them as backups online this way.

2. If it's a more general backup program you're after, I recommend Mozy Backup. You get 2GB free! And for every person you recommend, they'll give you another 250MB of space absolutely free! If you need more than this, which you might wish to use later, you'll have to pay a $4.95 fee per month to keep your data safe. It's worth it if you have a lot of data and your data is important to you. But if you just have a few hundred documents that need backup – your 2GB amount will be more than enough and it will be backed up absolutely free. I recommend you try it out, by simply signing up, downloading the necessary program to get things going, and getting your data backed up. Once you've set it up, which is quite easy to do as the site will teach you, it will be kept running in the background all the time. This means that as you add new documents to your computer, they will automatically be backed up online without you having to constantly fuss whether you've made the backups yet, or still need to. It will do it all for you.

These are just two really easy ways to back up your documents and photographs.

Reminder: Here are some of the ways you can lose your information:

1. Operating System crashes
2. Hard drive crashes
3. Virus or Trojan Horse
4. Computer is stolen
5. Computer physically breaks (a laptop drops on the ground!)
6. Something you simply never thought possible!

If you've got your hundreds of Gigabytes backed up on an external drive, you'll easily be able to transfer the files to your next computer or new working computer, by simply plugging it in and copying the files across.

Of course, if you did not keep your external drive at a friend's home and the like, and it gets stolen WITH your computer, then you'll lost your backups as well! Therefore consider the importance of keeping your data backed up online as well. Then, should anything happen to your physical computer, whether stolen or inflicted with a virus, you'll be able to log in – anywhere in the world – to your online backup and download your entire hard drive again. Terrific!

PASSWORDS

ONE word of warning!!! When you do subscribe to any online backup service (or any online service) use a VERY strong password. Passwords such as "password", your name, your best friend's name, favourite colour etc., should NOT be chosen EVER! A good password incorporates letters, numbers, and extra characters eg "$%!@#" etc. Choose a password of at least 6 characters, 8 is by far better, and 10 will make things pretty much impossible for the average hacker to get through. Choosing a password takes much wisdom. If you'd like some tips, look at what the professionals - Google themselves, have to say.

Friday, 30 October 2009

Inserting a Counter on your Blog or Web Site

VISITOR COUNTERS ON YOUR BLOGS AND PAGES
Site: www.histats.com

Whether your blogging or setting up a web page for fun or for generating wealth, you're going to want to know how many people are coming to your site regularly. If it's for fun, you'll get to know just how many people are enjoying your postings, your pictures, your insights and more. If it's for business, you may want to sell ad space or the like on your page. Advertisers are going to want to know how many "hits" you're getting. How many people are looking at your site every day, every week and every month. The more visitors, the greater your chances of being able to sell advertising space – and being able to generate real wealth.

Think of it this way: If thousands of people are reading your posts, it means that they're all interested in your content. If they're interested in your content, they're going to spend time looking at all the things you have to offer them. While they're doing that, they're going to also be looking at the adverts placed by others. People will click on those adverts, see the advertisers sites, and be tempted to now make a purchase on their site. So everyone wins! People come to your site. Advertisers are happy to pay you to advertise their goodies. And those reading your posts find themselves also wanting to purchase more things from the advertisers.

Once your posts are good enough, and they're generating visits, advertisers will be interested in paying you to help them. Then – everybody wins!

So, how do we get to prove (honestly) how many people are actually visiting and let others know about it?

There are many great web pages out there with a variety of counters you can choose from. I'm going to suggest just one. It's easy to get, it's fun to choose a counter that you'll enjoy using, and it's easy to implement the code on either your blog or webpage.

So follow me:

1. Go to www.histats.com
2. Register all your details, including your email address
3. Select a counter that suits your needs (a one line, two line, 3 or 4)
4. Go to your control panel at any time to see your stats and be able to change the look of your counter
5. Click on the Account button (with the tool button on it)
6. Select Get Counter Code and copy it
7. Go back to your blog
8. Go to Customize / Page Elements
9. Click to Add a Gadget
10. Choose HTML
11. Paste your new text in the box
12. DONE!

You're all set to go. You've realized the importance of what a counter can do for you and how it can add in letting you and your visitors know just how impressive your postings are. You've found a great site that lets you choose and customize a counter with a variety of choices. You've pasted the HTML text into your blog as a new gadget.

When you next view your site, you'll see just how many people are coming throughout the next few days and onwards.

NOTE: You are more than welcome to set your counter at any number to fool people as to how many people have actually already come. That's up to you. I like to be honest. That way, I myself actually know quite accurately just how many people are coming and where I stand. I find it better for my own personal knowledge of how well I'm doing.

Thursday, 29 October 2009

Change Your 2 Column Blog into 3 Columns

GOT A TWO COLUMN BLOG?
CHANGE YOUR 2 COLUMN MINIMA BLOG
TO 3 COLUMNS EASILY - BY YOURSELF


Blogging can really give one tremendous satisfaction. There's so much one can share with the world. I work using Blogger to set up my blogs and find it easy to work with. You'll get a variety of opinions as to which is the better blogging service to use, and many will be based upon the type of templates that come with that particular service.

When you blog, you have to decide what type of market you're blogging for. You might just one to share general information. If so, you may find that a two-column blog more than adequately covers your needs. You'll have one small column allowing you to set up a basic menu system. You might include previous posts, labels, and perhaps even an Adsense skyscraper or the like.

You might also want your blog to be fun. You must consider the purpose of your blog, because having a template – all pink with frilly flowers and the like surrounding your site won't do you any good if you're a "big man" wanting to share the latest technology news. Of course, if you're a young teenage girl, such a design will go down very well. You can also find templates with floating fairies surrounding the pages.

But what about those who are more serious? They want the formality of the general blog, BUT they want something more. When you join Blogger, you'll find a decent variety of two column templates available. But if you're like me, wanting to expand your bog out ever so slightly to include at least two main side bars and a middle section for the content, you'll want that third column – which you can't find anywhere on Blogger's choice of Templates.

Now, a warning is in order! You may start looking around at the various free template sites and notice 3-column templates which look terrific, and you'll want one of these. This is great, so long as you don't already have a blog running. Once your blog has been running for months and more – you must understand that everything – including all your fancy widgets (clocks, counters, lists and the like) have already been set up beautifully. You can certainly change your template at any time – using one of the free templates – but be warned, you may end up losing a lot of information you've already set up – most notably your linked-lists which may have taken you hours to set up! You simply don't want to lose those!

There are tutorials to help you through the process of restoring all the widgets – though this is not the subject of today's posting. The reason I'm not getting into it at this point, is because they can be quite time consuming and even then – if you should make one accidental mistake, you may find yourself having lost your hard work and having to re-set things up again. It won't be fun, and since blogging is about FUN – you don't want to find yourself in this snare.

So, having said that, let's turn our attention to the blog you're currently looking at. Actually, I love the Minima design. It's neat, simple and seems to do everything I want. It's got a business type look – professional and well-laid out. Only thing is – as mentioned before, you'll find that Blogger only gives you two columns.

When I began blogging I used to always use this design, but found myself in the situation of having now blogged for so long – unable to spend the necessary time and patience fiddling with things that have the potential of being lost. So I did some serious research into learning more about that 'fancy' HTML Template and CSS, so that I could understand how better to set things up myself *without* losing my old template and information.

I'd like to share with you just how easy it is to change various settings to turn your 2-column template into a 3-column template. As before, I'm going to be using the 2 column Minima Right-Side Template to work with. If you have the Left Side Minima (Minima-left) ie with the main body post on the right side of the thinner column, then simply change it to the right-side template (Minima) and follow me. You won't lose any of your gadgets and widgets by doing that – just that your blog will look the opposite way around.

Let's work through the necessary steps now:

1. Log in to your blog
2. Go to the "Layout"
3. Choose the "Edit HTML" tab
4. Expand the widgets by inserting a tick in the box
5. Do a search – Ctrl-F (Control Find) for #header-wrapper
6. You'll see something like this:


#header-wrapper {
width:980px;
margin:0 auto 10px;
border:1px solid $bordercolor;
}


What this means is that your main heading element has a width of x pixels. In my case I have expanded my header width to be 980, though your number might still be something like 660 or the like. I have found 980 to expand things to be just right!

Also at the bottom of the header section, change the max-width to 980 as below:


#description {
margin:0 5px 5px;
padding:0 20px 20px;
border:1px solid #eee;
border-width:0 1px 1px;
max-width:980px;
font:78%/1.4em "Trebuchet MS",Trebuchet,Arial,Verdana,Sans-serif;
text-transform:uppercase;
letter-spacing:.2em;
color:#999;
}


Back to the tutorial:

7. Change the width to a width that suits you best. As I mentioned 980 works quite well.
8. Do a search for #Outer-Wrapper
9. You'll see something like this:


#outer-wrapper {
width: 980px;
margin:0 auto;
padding:5px;
text-align:$startSide;
font: $bodyfont;
}


This tells you that the entire blog width from side to side is x pixels. Again, I have chosen 980 in order to make it equal to the header size. You can make it what you will, but start with this and then fiddle around afterwards

10. Your width may once again be something like 660. Change it to 980
11. Immediately after this block of code, insert the following:


#left-sidebar-wrapper {
width: 220px;
float: $startSide;
word-wrap: break-word; /* fix for long text breaking sidebar float in IE */
overflow: hidden; /* fix for long non-text content breaking IE sidebar float */
}


What this does is to now add a column of 220 pixels on the left hand side of the main blog post area. You can make it any size you want of course – but keep it this way to start so that you'll get to see your blog in balance.

NOTE: If you are working with the Minima template which already has the smaller column on the left, you'll find yourself in trouble as this code inserts the column on the left side. For this reason – as mentioned above – make sure you are using the Minima with the smaller column on the right side before making these changes.

12. You've come a long way now. You're blog has now been increased in width size and you've added the additional column!
13. Just below the left-sidebar-wrapper, you'll see another piece of code which looks like this:


#main-wrapper {
width: 500px;
float: $startSide;
word-wrap: break-word; /* fix for long text breaking sidebar float in IE */
overflow: hidden; /* fix for long non-text content breaking IE sidebar float */
}


Again – pay attention to the width. In your case, your code may indicate something like 410. I have chosen to increase the amount to 500. What this does is to increase the size of my main blog post article area. You can keep it at 410, but then you'll have a large empty space on both sides. The point is to maximize screen space. So by increasing it to 500 pixels, you'll be getting the most for your "money".

14. Make sure your width is 500 instead of the usually set 410. If you wish to fiddle with this amount, by all means, find something you're comfortable with.
15. You're DONE for now!

What you've now done is to increase the size of the entire blog space area to allow for the new column. You've then inserted the new 3rd column, and you've increased the size of the blog post area. You've now got a 3 column blog without having lost anything!

16. If you wish to make things symmetrical, you may wish to increase the size of your footer area to be the same as the header area. This can easily be done by searching for #footer and finding the following piece of text appearing at the bottom:


#footer {
width:880px;
clear:both;
margin:0 auto;
padding-top:15px;
line-height: 1.6em;
text-transform:uppercase;
letter-spacing:.1em;
text-align: center;


You'll probably find that the width is set at the usual 660 pixels or similar. I have changed mine to be 880 pixels. 970, 980 or 990 does a great job too. Experiment!


17. Make sure your width is now set at 880px
18. In the same section of the footer scroll to find this:


<div id='content-wrapper'>


19. Locate the "main wrapper" id which looks like this:


<div id='main-wrapper'>


20. Now paste the following code immediately above the main wrapper id:


<div id='left-sidebar-wrapper'>
<b:section class='sidebar' id='left-sidebar' preferred='yes'>
<b:widget id='BloggerButton1' locked='false' title='' type='BloggerButton'/>
</b:section>
</div>


18. Happy with your new template? SAVE YOUR TEMPLATE
19. DONE DONE and DONE!

When you view your blog for the first time it will still not look 100% correct. What you will now need to do is to rearrange all your page elements as you wish them ie. so that some of your widgets will appear on the left of the main blog post area, and some will appear on the right.

To rearrange:

1. Click on the Layout option
2. On the Page Elements page you will see how your blog will look after publishing. Here you must delete the newly created temporary widgets and move the remainder elements around so that your page will take on it's new appearance.

Wednesday, 28 October 2009

Tweet Me Me Me Me

You've probably set your blog up and done some really good posts. As you start blogging you may find that you'd really like to get your message out to the world faster than ever. Your blog post is worth at least a million dollars – but will you get it if nobody knows about it?!

Today, Twitter is taking the world by storm. Imagine the idea of having 20 000 followers (at least!) and sending a message to all of them about your terrific blog post? That's of course Step 1! Step 2 is to make sure that everyone else who is also connected with Twitter see to it that they too advertise your blog post to their 20 000 followers. That's called re-tweeting and we may talk about it's value in a later post.

Today, I'd like to share with you a quickie on how to encourage others to re-tweet your post from within the blog post itself. If you look at the top right side of every post I've done, you'll see a "Retweet" button. Give it a try on this very post. Simply click on it and when logged in to your Twitter account, hit the enter button. Voila – there you go, my post just got advertised to all your followers. Terrific. It's exactly what we want, and one of the fastest ways of getting others attracted to our post in seconds!

You're going to get hundreds and thousands of people looking at your blog posts. But without the "Retweet" button installed on your blog template, it's going to make matters difficult for the average user to want to let others know about your post. But WITH the "Reweet" button they'll feel far more relaxed with the idea of letting others know fast about the wonderful post they've just done. Go ahead and retweet this very post to all your friends. You'll soon see how fast others will catch on to it!

Now we need to help to set up YOUR blog with this terrific feature. It does take a bit of technical know-how, but you can do it! Just follow me:

1. Log in to your blog (For more info about blogs see Lesson 5)
2. Choose the Layout tab
3. Choose the Edit Html option
4. Click "Expand Widgets"
5. Do a search using the Ctrl-F option (Control Find) and look for:


<data:post.body/>


6. Just above this, paste the following text:


<div style='float:right;padding:4px;'>
<script type='text/javascript'>
tweetmeme_url = '<data:post.url/>';
tweetmeme_source = 'yourtweetusername';
</script>
<script src='http://tweetmeme.com/i/scripts/button.js' type='text/javascript'/>
</div>


7. Change the word "yourtwitterusername" with your actual Twitter username eg. in my case – rebeliyahu
8. Click "Save Template"
9. DONE

You'll now see the Retweet button as it appears on my blog in your own blog posts.

Good luck and get others Twittering all about you today!

If you don't come right, be in touch. There are other versions of Retweet buttons available too. If you see something that interests you, let me know, I may well have the code for it!

Sunday, 18 October 2009

Becoming a Success - With Video Clip


Becoming a millionaire, or simply becoming wealthy is all about using all our talents correctly. We have countless outlets available to making this happen for us. The Internet in today's times is just one of them. It's a substantial one at that. It is probably safe to say that those who do not use the Internet today to market and advertise themselves, are losing out on their biggest available asset of letting others out there know about themselves. More than this, they lose out on the immediate opportunity of bringing in income while sleeping (literally) – by simply already having a web page or blog with things to sell on it – or even Adsense adverts that people will click on – while they sleep – bringing them extra income by the time they've woken up. Great – isn't it?!

We all have talents though – and it's those that must ultimately be exploited in order to meet with success. But – so many of us continue ask – "when will it happen to me?!" When will all that glorious wealth moving about in the world, come to me?! When will others get to know the real me, the person I'd like to introduce to the world?! When will I be able to become the person I really am? Abraham Maslow provided us already with a hierarchy of needs with self-actualisation being set right up at the very top. How many of us actually reach it?! Yet we continue, and the biggest lesson in life that we must take with us is indeed to continue onwards, no matter how many times we fail. Failure – if we can call it that, is merely a stepping stone to success. Those who think they are failing must realise that they have chosen for themselves the path of failure. Those people – on the other hand, who recognise the greatness in themselves, who see themselves as continually growing – even with the falls in life – are destined for success. Success of course comes about in many ways, and does not only have to be money-based, though of course being blessed with wealth does make one think one has achieved much!

For today's post, an inspirational video for all to watch. To make us realise that there have been many other "ordinary people" who've gone through the same things we go through daily. Yet with all this, they have stood firm, and moved forwards too – in order to make themselves into the success they became. As for you – you're no different. You too can become that success. There is no such thing as despair, no such thing as failure, just the continual life-journey of growth and success. This blog has already provided a number of tools to work with. We might be taking a slight variation in our financial growth ideas from here, having already explored many areas of the Internet. We'll continue with the Internet and the web as a basis for generating wealth, but will also work on other areas of growth that we all need to work through in order to see how we can attract money towards ourselves through other means. It's really all about using the tools we have available to us – as well as becoming positive in ourselves through motivating ourselves correctly, so that indeed – all that glorious wealth making it's rounds, can find it's way into our own lives too.

As always – wishing you much success. Keep in touch, let me know how you are doing, and how these lessons and ideas may be helping to shape your life. Enjoy the video clip.


Sunday, 19 April 2009

Lesson 14: Social Bookmarking


LESSON 14
SOCIAL BOOKMARKING
SITE: http://www.socialmarker.com

So, you've finally got something on the web that you believe to be the next best thing! It could be an article you recently wrote and published on one of the web's article database sites, or it could be a posting you made on your blog. It may even be one of your latest web pages linked to your main web page. It could even be a page of your photography – or a page of your online shop where users can see more about what you have to sell – and of course buy from you directly!

Did you know that there must be some 15 BILLION web pages available at the moment? Just imagine this now. Let's say there are 6 billion people in the world… and each of them is looking for something in particular. Well let's do some wild guessing now. Imagine that you've just developed the latest widget gadget! This gadget is the world's greatest bread preserver. In addition to being able to preserve bread for months on end without the slightest trace of mould or becoming dry and hard – this unique machine doubles up as a refrigerator – because it needs to be cool to keep the bread fresh. It also doubles up as an oven – so that you can just turn up the heat quickly when you need to warm the bread (always tastes better this way!) It has some other unique abilities, such as being able to fold open so that you can place a number of loaves of bread (of various kinds) inside it. In fact, it has a special shelf that also allows for the actual baking of bread to take place. It's really a superb device. As I said – the latest widget gadget available. This device could make you millions and you could find yourself on the next "World's top 100 Billion" list. Fantastic!

Anyway back to reality. So you've got the goods sitting in your home all ready for production. You've got the webpage designed artistically so that any deficiencies in the product will be more than made up by the splendid graphics you've chosen to make your page a big winner. And you've uploaded a beautiful picture of your widgetmagoo. Now there you have it – your page is out there with Paypal button on and all. It's sitting… and sitting…. You can't seem to work out why nobody knows about your product though. It's there – isn't it?! It's on the big I(nternet!)

Hmmm… let's get the picture clearer now. So, you've got a bread maker haven't you?! And yours is the best – isn't it? What with the built it oven, fridge, and radio/cell phone too. And there are really only 15 BILLION pages of Internet out there. What with 6 billion people – I'm sure that at least every third person should get to your page…. Eventually!

Of course the truth is, if you've done a recent search on Google for "bread maker" (for lack of a better word to describe our widgetmagoo) you'll get over 1 million results. Now, your superb page is sitting there somewhere of course. But maybe... just maybe it's number…. 1 million! Considering that the average person would have to click on the "next page" button some 100 000 times (10 pages are shown on every page) – I guess it would take the average person a few years before he gets to your page, and by that time, he'd be too exhausted to think of new widgetmagoos.

Of course if someone did a search for "widgetmagoo" they'd probably see your listing in the number 1 position. But I just don't know how many people know about widgetmagoos. So, it's going to be kind of difficult to make sure people get to know about your product – whether it's called a "widgetmagoo", a "widegetmagee", or even just a plan old fashioned "bread maker" or "bread freshener."

But we've got the goods, and we know that once people see them, they're going to buy these little gold nuggets in no time at all – just as soon as they see them!!!

Welcome SOCIAL BOOKMARKING!

Social bookmarking is a way to get others to know about your famous page in a zillionth of the time it would take for them to know about it – without the bookmarking! In fact, you have two advantages with social bookmarking. One is that by doing this, anybody else who uses these bookmarking tools will have faster access to your page – if they're serious about finding the latest greatest things on the Internet. And second of all, when one social bookmarks, one's own page automatically gets a higher list ranking with Google. Google tends to think that if someone out there (no matter who it is – whether the author himself or another person) – bookmarked a page – it really must have some value. In fact, you might find your page suddenly jumping to position 20 from position 1 million in just a couple of days! And if it's really something special, and people do start clicking on it… well, you may get good ol' position number ONE! And that's really what the web is all about. You want everyone doing a search for "bread maker" or "bread freshener" or the like, to end up seeing your page at the number one post so that they'll all click on it and buy YOUR product! Whoopee!

So, now for the practical. How do you bookmark your site, your photographs – whatever?!:

Take a trip to www.socialmarker.com – because this is the site that will make things easy for you – to get your site listed in some 160 places in 5 minutes flat!

Just one word of warning before we begin. Do be careful not to get too carried away with only your pages – and doing all 160 bookmarks every single time. Google has it's ways of seeing what you're up to… So if you start abusing the system which is made to actually help people and not to simply spam everyone with your goodies – you may find yourself in trouble. This won't do much good to the terrific widgetmagoo you have recently invented, so do things cautiously.

Let's go now:

You'll actually see a button on the page under the "how to use it (help)" section. If you drag this button to your main browser toolbar, you will automatically set everything up for future use. It will make life easier from now on, because you will now have a button on your toolbar that will allow you to bookmark any page by simply clicking on that button – instead of having to log in every single time to the main site. So do add it.

Once you've added it, you're ready to begin!

1. Go to the site you'd like to bookmark so that others will know what you're up to.
2. Click on the social bookmark button on your browser (the one you just set up)
3. Fill in the information about the site that does not already appear in the boxes.
4. You'll need a title for your post (such as Widgetmagoo Miracle.)
5. You'll need the link (it should be filled in, because you're already on the page.)
6. You'll need some text – something like – "This tool will keep your bread fresh for years on end! A must for anyone who ever eats bread!)
7. Then some tags (bread,maker,fresh,widgetmagoo,oven,fridge,bake,cellphone)
8. Check (place a tick) in the social bookmark engines that you want to list your page on. Choose them all, or just a few. Some work better. I'd recommend Propellor, Digg, Twitter, Reddit, MrJeeves.ask.com. Though you can really choose whichever you want. There is no reason not to use the others at all. Experiment and have fun.
9. DONE!

Now what you'll need to do is to actually make your submissions to each of these sites. Most of the information will appear on the bottom of your page so that you can simply drag and drop your info into the required blocks without having to re-type the pieces of text you entered about the site on the front page. Each page will tell you as you go along how they work.

You'll have to register with each of them (which is a bit time consuming for 160 sites!) But once you're registered, you'll simply log in, submit the info, and everything is done!

Once you've done this, you'll be listed on these utilities. They work in incredible ways, and before long, you will actually see people coming to your site from having found you on one of these bookmarks. It is actually quite remarkable how it all works. I am surprised every day when I see how many people find their way to my sites from these bookmarks.

I'd suggest getting stuck into them immediately, as you only stand to gain as hundreds and thousands of new people get to find out more about you faster than ever!

If you still need help, please do email me and let me know what's on your mind. rebeliyahu@gmail.com

For those interested in watching a video, below is a short and easy video to watch that explains social bookmarking in tv form!

Wednesday, 4 March 2009

How to Fundraise


How to Fundraise


from wikiHow - The How to Manual That You Can Edit

Whether you're raising money for victims suffering in a humanitarian disaster, or fundraising for Little League or another kid's sports team, there are a million ways to earn money and reach your goal.

Steps

  1. Set a goal (How much do you need to raise?).
  2. Create a timeline (How much time do you have to raise it?).

Who Should You Raise Funds From?
  1. Who will you ask for the money (What is your target audience?) Whether you are raising money for your school or a political candidate, this is critical. Look first for a list of previous donors to this or similar causes. Most political campaigns donors are now posted on the web and are searchable by zipcode. If this is unavailable create a list from Christmas-card lists; school,club or church directories; or lists of co-workers or neighbors.
How will you ask for the money?
  1. The likeliest method is an event. This sets a date certain and helps keep the fundraising on-track.
  2. Take advantage of any special talents you might have. Maybe you sew and crochet--make some items to sell. You can sell them online, at a craft show, or set up shop in your own front yard, and have a garage sale to go with it, to earn extra.
  3. Log onto the internet, type in "fundraising items", or you can type in "wholesale candles", or "wholesale picture frames",depending on what it is that you want to sell. By going through wholesale, you can get a lot more products, than you would going to a retail store, and for more than half the price.
  4. Make a sign or print up some fliers, letting your customers know what their money is going towards.
  5. Have a change jar set up on your pay table, and people can drop their loose change into it, at the end of the day, go to your supermarket, or one that has a change-counting machine. Drop all the change into the machine, then it will print up a receipt for you, to take over to a cashier. Then the cashier will hand you the amount in bills, and you won't have to send change, or spend change, to fund your fund-raiser.

Contact a fundraising agency
  1. Create an online fundraising page. Create a webpage, send the link to your family, friends, co-workers, parishioners, teammates, etc. and collect donations via credit cards online. It's easy and simple, and eliminates spending a lot of time sending letters, calling people, and organizing big events.

Video


More important tips for raising funds.

Tips

  • You can have friends, family, and people in your neighborhood donate items to you, so you can sell them in your yard sale.
  • If you're already on a tight budget, then a craft show probably isn't for you at this time. For many official craft shows, you have to be willing to spend $25.00 and higher for a booth.
  • Get a backpack or briefcase instead of handling your papers freely. It makes you look professional and it doesn't let your papers fly in the wind.
  • Many foundations will only give to charitable not-for-profits (i.e. 501(c)3 IRS tax status). Be sure to include a copy of this status with any letters you send to a foundation for support. Less work on their end to verify your status equals more time they can spend on learning about your cause and qualifying a contribution.

Warnings

  • Fundraising agencies typically take a large percentage of the funds they raise for you. Be sure to carefully review the contract terms before hiring an agency to raise funds for you.

Related wikiHows


Article provided by wikiHow, a wiki how-to manual. Please edit this article and find author credits at the original wikiHow article on How to Fundraise. All content on wikiHow can be shared under a Creative Commons license.

How to Raise Money


How to Raise Money


from wikiHow - The How to Manual That You Can Edit

Raising money can be difficult whether it is for personal or charitable reasons.

Steps

  1. Formulate a plan on paper. You'll want to record your financial goal and organize yourself. Is this a set goal (e.g., I need $10,000 for a new car), or a continuing effort (e.g., I need $3,500 a month to keep my organization running)?
  2. Decide how you're going to make it happen (e.g., get a job if you don't have one or an extra job if your goal is short-term). Are you starting a business? Try finding investors by presenting a business plan and a predetermined dollar amount needed. Use available free resources first (e.g., Small Business Association or S.C.O.R.E.). Are you looking for that new computer? You could also go to individuals or organizations for capital or sponsorship. Try asking friends or relatives for loans or gifts (please see warnings below).
  3. Put your plan into action, and stick to it.
  4. Make sure to thank those who helped you get to your goal.
  5. Create an online fundraising page (e.g. try www.firstgiving.com). Create a web page, send the link to your family, friends, co-workers, parishioners, teammates, etc. and collect donations via credit cards online. It's easy and simple, and eliminates spending a lot of time sending letters, calling people, and organizing big events.
  6. GPT sites online can also boost your profits, earning around 20-50 easy dollars a month loads of contests for game systems, Apple items and such.

Tips

  • The more organized and professional you appear, the better your success will be. Also, in all financial matters, be courteous and polite with everyone you deal with - money can be a touchy subject.
  • Be honest--especially with yourself--about what you really need.
  • Prioritize by importance. You don't need an MP3 player before food do you?
  • Have a single or multi-family garage sale. Make it a fun event and feature music, balloons, snacks, games, and perhaps even outlandish "provenance" for your most treasured junk (with disclaimers, of course).

Warnings

  • Watch out for quick fixes such as fast credit repair clinics and high-interest, short-term loans. (Remember, your goal is to raise money, not sell your soul.)
  • Don't forget to focus on the positive--first; your attitude can make all the difference.

Related wikiHows

Article provided by wikiHow, a wiki how-to manual. Please edit this article and find author credits at the original wikiHow article on How to Raise Money. All content on wikiHow can be shared under a Creative Commons license.

Wednesday, 28 January 2009

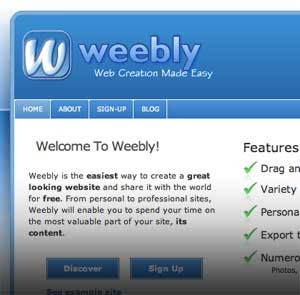
Lesson 13: Weebly - Create Your Own Webpage!

LESSON 13

WEEBLY

CREATE YOUR OWN WEBPAGE!

Site: www.weebly.com


If you’ve been keeping up with our lessons systematically, you’ll have a great idea of how many tools are available on the Internet to help one accumulate significant wealth.


One way of expressing oneself is through a blog, where one updates one’s thoughts and ideas on a daily basis (or to the degree one is able to.) Another way of setting an opening on the Internet – a portal – where people have the opportunity to see what you do, is by setting up your very own web page.


Obviously we’ve all seen webpages – some beautiful, some with no thought put into them at all, and of course we know to which we’ll return in the future! Is making a web page a difficult thing to do, or can anyone with an average brain make one up? What types of programs does one need to make a web page? Will it be expensive?!

Actually, in today’s times anyone can create their own *attractive* web page in just minutes – with no more software than already built-in programming on the Internet itself! That’s right, it’s this simple! What are we going to do to create our page? We’ll log in to a site that is loaded with dozens of free templates. We’ll then choose a template, and begin making our page with about as much ease as dragging the relevant boxes we need to use to wherever we want them to be! It’s really quite simple!


Within minutes, you can have your own page up and running. Let your thoughts go wild! What would you like to share with others? Let them be able to interact with you, learn a little about yourself, or see samples of some work you do. You can even upload pictures and videos for others to see, as well as uploading your own files for others to download to their computers to view on their side.


Let’s get to work!


  1. Log in to www.weebly.com
  2. Register… Enter a username, password and email address
  3. DONE!


Yup! That’s all that there is to it. You’ve now set up your own web page. Now comes the fun part. You’re going to choose a template for yourself from what’s available. They are really all attractive, and you’re sure to find something worthwhile to use. Then you’ll see some tabs on the top left side of the screen. When you click on these, you’ll see various images appear on the right next to these tabs. These images allow you to enter text on your page, to insert a picture, a file, a video etc. You can choose a layout of one column, or two (or even three if you’re really smart!)


Snap, Snap – just like that – and you’ve got a simple page going. You can also add pages and set up tabs on your page so that users can navigate easily through your page. One page might have information about yourself. Another might have a contact form for users to contact you. Another may have contact details for users to find out more about the different modes to be in touch with you (eg. Facebook, Twitter, your landline, your cellphone, your blog address, your dog’s blog address (in case yours is offline for some reason), your LinkedIn details, even your email address! And of course anywhere else where you want people to contact you – just let them know. It will be hard to stay away from the public’s eye once you’re done!


Once you’ve done your pages, you’ll click on the Publish button and Weebly will make sure you’re all set up for millions of people to see. Get to choose your very own name for your site as well. Make it descriptive and easy – so that others will be able to find you quickly!


Does this seem too hard for you? Be in touch and let me know what difficulties you’re having. rebeliyahu@gmail.com


While you’re at it, see what I do in more detail, and how I have used Weebly to promote my own work:

http://torahonline.weebly.com


You’ll see, I’ve used the exact same techniques I’ve described in this short article, to design my page, put in images, files, divider bars, columns, tabs, contact details etc.


It really is this easy!


Once you have your page up – you’re good to go, and let everyone else know what you can offer them. Isn’t that what this course is all about? Using every available resource we can (free of course!) to let others know of our talents and products, and make some serious sales!


By the way, for those of you who may not have created your blog yet, here’s some great news! You can publish a blog right inside Weebly too! You’ll see the option listed once you get started.

Want to learn more? See this video:


OR

Purchase a book

to help you understand more about webpage design.
Click on image to see just one of the many books available,
and start reading up more about how to create simple,
attractive and prosperous webpages.


Monday, 26 January 2009

Lesson 12: Screw It, Just Do It!


LESSON 12
SCREW IT LET’S DO IT
SCREW IT... JUST DO IT!
RICHARD BRANSON

When one wishes to become great in something, one of the best ways of learning the ropes is to learn from those who have already succeeded in a particular field. We’re learning how the Internet can be used to generate wealth – but we need to also see the real people behind the financial success stories. More than this, by reading articles such as this which draw one to the right materials to work with – one is also using the Internet to generate wealth.

Richard Branson is known the world over for his financial success. In addition, he has done much good work in the area of helping others with the finance that he has. But, being a regular person just like the rest of us, he too has tackled life head on, going through a variety of his own tests. He wasn’t just born with all his wealth.

He has certainly been adventurous – taken risks, and leaped into doing things most of us might not dream of doing. But he has done it and made a financial success of it all. He has the distinct advantage over many in having worked through life himself – pulled all his resources together – and gone out and made a success – even if he never had anything before!

They say that copying another is the best form of flattery one can give the other. When it comes to making a financial success of our lives, we can all learn from those who have succeeded – and follow some of the paths they’ve taken.

There’s no need – of course – to do everything they have done. But, there is a need to see how they managed to work through their own struggles and see how they overcame them.

In this relatively short book, Richard Branson gives us the cut (without any additional unnecessary info) in how to simply go for it! How to see the skills one has – and how one should take what one has and move forwards doing the things one can – and make a success of one’s financial affairs, and one’s own life too.

It’s another MUST HAVE for those looking for a book to give them encouragement and super energy to get going – and make large amounts of wealth.

More than anything – love making money and love life. It’s all an adventure, and the more you’ll enjoy it all, the more successful you’ll be.

Wednesday, 21 January 2009

Lesson 11: Getting the Right Equipment. Kindle Your Fire!


LESSON 11
GET THE RIGHT EQUIPMENT!
KINDLE YOU'RE FIRE!
So, we’re learning how to use the Internet to make money. Well, part of using the Internet is learning more about how using modern technology can improve our lives. We’re able to be more mobile, doing what we want to do, while the technology does the work for us! Okay – it’s true, we have to do *some* work too!


Today, I’m going to introduce you to a tool I believe will help you in being more mobile, accessing information faster, keeping up with the times and a bunch of other things. Let’s call it the latest craze – or maybe it’s just one of the best devices of the century. I’d recommend it as a necessity in every household!

In the old days, you’d have to buy shelves and shelves in order to put your thousands of books upon them. Sure, you’ll be reading them all, and the books do a great job at impressing everyone just how knowledgeable you really are. But what about when you’re going on holiday, or just simply travelling? You can’t take all your books with you. And after all, you simply cannot afford to lose out on reading the latest. Whatever the latest is – that’s what’s going to help bring in an income, because others’ will be interested in that.

You’re going to need a portable bookshelf, one that you can take with you wherever you go. GREAT NEWS! It’s available, and it’s going to be a gadget you’re going to appreciate for a very long time!

Kindle is Amazon’s latest device, which allows you to download books, blogs, magazines and newspapers! All into the palm of your hand – literally! And what’s so great, is that the screen is a clearly visible one.

Imagine buying a book from your living room and having it delivered to you within a minute! This is Kindle! And after all, because we’re interested in creating wealth, we’re going to be doing a lot of reading. This site will review the best books to read in order to learn how better to use our talents to truly make financial success. In short, this is going to be your best buy yet – and it’s going to help you get access to books in just moments.

Wishing you much success!


LinkWithin

Related Posts with Thumbnails